My Life

I am a mother of three precious girls, an avid crafter and have recently returned to California after eight years in other states

Thursday, June 28, 2012

Small Projects

I have been getting small projects finished although my larger projects have been either languishing (still need to resize the butterfly squares of baby quilt #2) or progressing very slowly (their growth charts are getting there and I will have photos soon). 


But in the mean time, here are the Father's Day gifts the girls and I made for their Daddy and their Pho Pho.  Scrub caps with the girls handprints and name (great gift for doctors that spend a lot of time in the OR).   I had planned to post these on Father's Day but got a bit overwhelmed with the girls birthday planning and photos. 


I thought taking their footprints was a messy process.  It doesn't even compare to handprints.  Dara managed to grab the strings of one of the caps while I was trying to get Tess' prints and got paint splotches everywhere. 

Tess didn't like the feel of the paint on her hands and started crying.  She is much more sensitive to sensory experiences than Dara is.  I think I need to start doing more sensory activities with them so she doesn't get upset so easily with the different textures. 


You can also see where Dara got some paint on her fingers of the hand I wasn't printing and started grabbing the scrub cap.  I touched up the handprints using a tooth pick with the white paint and tried to cover some of the wayward splotches with black paint.  But Dara's left handprint on my husband's cap was just too messy so I left the white splotches as is.  Their chubby little handprints still look cute, even if it they are messy. 


I saw this project on Pinterest and thought it would be a great idea for the girls' and my summer travels in CA.  I got a hand towel on sale at Target and made the tie out of the same material I'm using for the growth chart binding.  It was really fast to make; the tie took the longest but shoe laces or ribbon would be an easy no-sew alternative to the tie I made.  I have slots for our tooth brushes (even Kevin's for future trips), tooth paste, dental floss, my deoderant and then a large slot at the end for anything else I think I need.


Rolled up, it makes a nice and convenient bundle that protects your toothbrushes.


Got to love Pinterest!

Tuesday, June 19, 2012

Birthday Cake-Smash Photo Shoot: Take #2


 I consider this photo shoot much more successful than the previous.  Having the all pink backdrop looks so much better than the closet doors and the wall.  So much better.  This time I baked a cake that was much lighter and more smashable . . . although that didn't end up mattering.

Another improvement I forgot to mention on the last post was their diapers.  When I bought these faux jeans diapers months ago, I knew I wanted them in their cake-smash pictures.  For anyone interested in where I got them, this is a great site for cheap, cute cloth diapers: Just Simply Baby.  On Saturday, however, they were at the bottom of the dirty diaper wet bag and I resorted to using the pink and orange diaper covers.  Today I made sure they were clean!  They just look so cute in their little blue jeans.


There were still problems and details I wish were better, of course.  The girls did not like wearing their party hats.  So to save the stress and the mess, we left them off for the actual cake pictures.


Dara was very quick on the draw and got to the cakes before we moved Tess in closer.  She decided she couldn't pick them both up and settled on just grabbing hers, silly girl.  But I would have liked to have a picture of both of them sitting, smiling at the camera, with the cakes in front of them.  I can always dream, can't I?  In fact there were very few smiles which is the norm with these girls at picture time.


There were sadly some more tears.  I think it is the frosting that is setting her off.  Tess tried reaching for her cake a couple of times but really did not like the frosting getting on her.


I got a few this time where she was not crying, so that is progress.  She managed to get some frosting on her foot and we fed her a couple small pieces, but that is the extent of her cake-smashing.


Dara was very cooperative and gave me a lot of great shots, but there technically was no cake-smash.  She just picked it up again with both hands and started gnawing on it like last time.  Funny girl!  If I was doing a Take #3 (which I'm not) I would bake one big cake and let her have at it.  Tess would probably just sit and watch her sister.  Dara would still try to pick it up, I'm sure, but I think she would actually have to resort to smashing it into pieces to eat it.


The aftermath:  Today is bath day anyway, so I just brought them up to the tub.  Had to rinse a lot off Dara and you can see her hand prints on the tub ledge.  The frosting made the bathtub more slippery than usual and we had a couple slips and crying.  But no major damage luckily.  I would recommend the slip-proof bath mats for this clean up.


I cleaned the 'set' up too.  After lunch I shot some more photos of them.  I had a great idea for the chalk board signs for the next time that I use them.  The girls always pick them up and most the time they end up backwards with no writing on them.  So my brilliant idea is write the same thing on front and back so there will always be writing showing.  Of course that doesn't help when the signs are upside down or out of order.  1 OLD YEAR!


Back to tutus and party hats.  I know I'm their mother and very prejudice, but they are the most adorable baby girls ever!


This will be the last take.  I'm pretty well satisfied with the photos I got and I'm also very tired.  We are throwing them a late birthday party in July when all the family is out visiting so I'll have some more birthday photos in a month.  A big thank you to my husband for helping me out with both photo shoots.  Keeping track of both crawling babies, the props and the camera would have been impossible without him. 

Saturday, June 16, 2012

Birthday Cake-Smash Photo Shoot: Take #1

The girls turn ONE on Monday. I know, I can't believe it either. So today, we took pictures of them eating cake. I got a couple cute photos, but some vital things went wrong.  That is why this is Take #1. Tuesday we will try again and hopefully be more successful.  


 I took a couple of cute photos of them in their tutus and party hats.  The party hats I made very quickly earlier in the day.  They are felt and very easy and fun to make.  I just cut out the cone shape using a disassembled dollar store party hat as a pattern and cut out felt flowers and leaves.  I layered everything on the cone while it was flat.   Then I tacked down the flowers with a few stitches on the sewing machine.  I folded it inside out, sewed up the seam and turned it right side out.  Pinned to their hair bands it makes a quick, easy and cute party hat.  


One of the main problems with the photos is that the set is obviously not in a studio.  I really would like a more polished, professional look with these photos.  The walls and closet doors make it look pretty bad.  So I will purchase a second pink table cloth and hang both of them so that the background is all pink and girly and hopefully a little better looking. 


Another problem was the cake itself.   I tried to make a healthy cake with applesauce and no sugar using a recipe that I had found online.   Man, did that thing turn out dense.   It was like a brick. Dara picked up the whole thing and just started gnawing on it. There was just no smash in the cake-smash . . . their little hands couldn't do any damage to it.

Poor Tess was really upset about something by the time we brought the cake out.  Either the hat was really bothering her or she was still having teething pain or the whipped cream frosting felt too weird.  Needless to say, she was not a happy little birthday girl and was crying in most of the pictures. 

Hopefully we will fix the glitches by Tuesday.  And I really hope that Tess and Dara will be in radiant moods and smile for the camera!

Wednesday, June 13, 2012

Hanging Frames on a Ribbon


I purchased four cute, colorful frames from Michaels on sale a while ago.  I had originally planned to put them somewhere in the nursery.  Only our household doesn’t have many surfaces where I can stand up photo frames to begin with.  That space gets even more limited when trying to keep things out of the babies’ ever expanding reach.  What to do?
These frames had nothing on the back to hang them on the wall.  But I knew I wanted them lined up in a column anyway.  So I thought stringing them from a cute ribbon would solve my display problem.
Making this tutorial to show how I did it, really makes me appreciate all the bloggers out there who post the many great tutorials that I use.  Getting everything organized and taking the pictures (and forgetting to take the pictures and then having to backtrack) just adds a lot more work to making an item.   So thank you to all those bloggers out there that go through the effort to share their ideas step by step. 


Frames on a Ribbon


The supplies you will need are:

One wide decorative, sturdy ribbon
One narrower ribbon (it remains hidden so color doesn’t matter)
Four frames with a kickstand (my kickstands attached parallel to the bottom edge--not sure if frames with an angled kickstand will work as well)
Two wooden rings (or any type of decorative shape that you can sew a ribbon on)


Lay out the wooden rings and frames on your decorative ribbon using a ruler to keep the distance between frames constant.  Leave enough room at the ends of the ribbon so that it can be folded over and sewn down (take into account that the frames will hang a little lower on the ribbon than pinned because the ribbon loops have to be a little wider than the kickstand top so you have enough room to slip it over the kickstand base).


Mark the placement of the top and bottom of each frame on the ribbon with pins. Then measure the distance from the top of the frame to the top of the kickstand and pin that distance on the ribbon.  In the above photo the yellow pins marks the top and bottom of the frames, while the red pin marks the where the kickstand attaches to the frame.


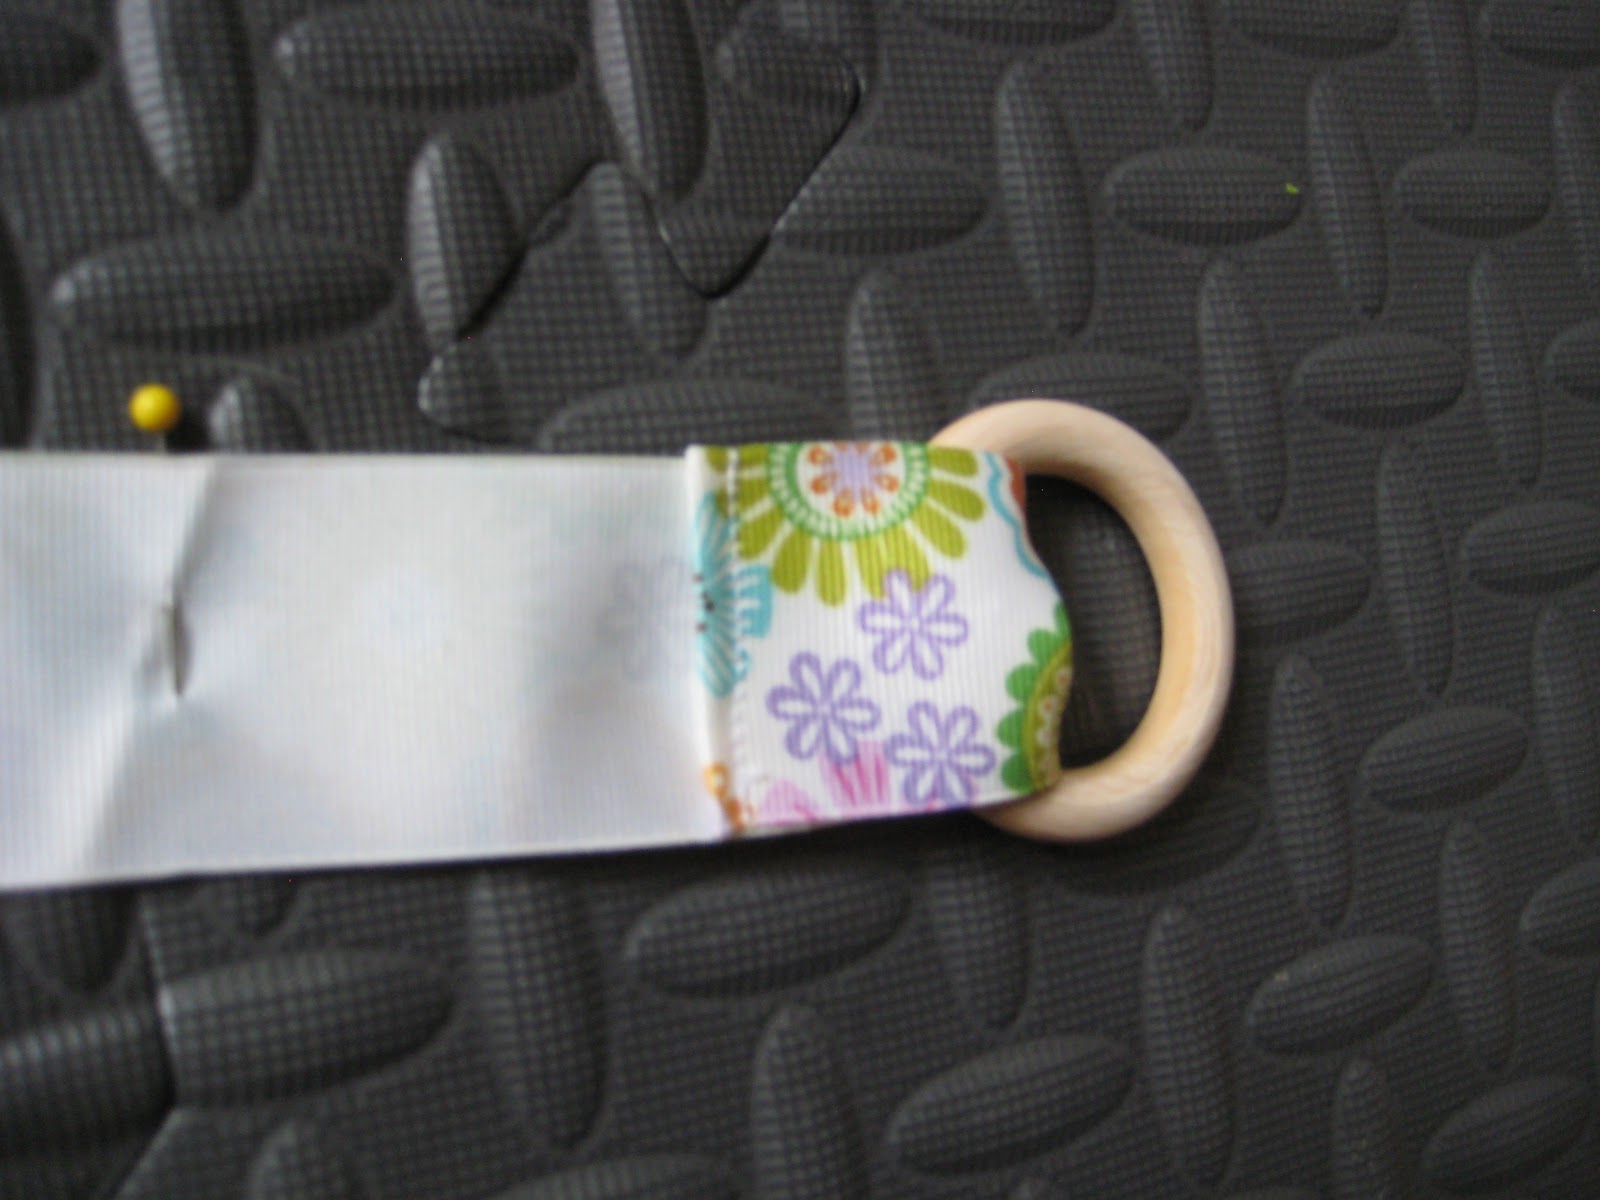
Insert each end of the ribbon through one of the two wooden rings.  Turn the edge over 1/4 inch and sew it down.


Measure the base of the kickstand.  Cut four pieces of the narrow ribbon twice as long as the kickstand base minus 1/2 an inch (or just cut it twice as long and allow the ribbon's ends to touch in the next step if you find that easier).


 Pin the ends of the narrow ribbon perpendicular to the edges of the decorative ribbon where you marked the placement of the top of the kickstand (for reference, I replaced the red pin with pink and white pins).   Leave a half an inch gap between the ends of the narrow ribbon if you cut the ribbon twice as long as the kickstand base minus 1/2 an inch.  Sew the ends of the ribbon down.  Repeat for each frame.


Insert the kickstand of each frame into ribbon loop and hang by the top wooden ring.  Voila . . . a cute way to hang cheap little frames.

I have tried to be clear but please let me know if any parts of this tutorial do not make sense.  Thanks.

Wednesday, May 30, 2012

Baby Quilt #2


I have been making some progress on baby quilt #2.  The center section of the quilt top is pieced. I pieced the thirteen butterfly blocks in the evenings after the girls were in bed.  Sewing them together was quick and easy after I had gotten them all made. 


This is a photo of baby quilt #1 which I finished before the girls were born.  I decided to follow the same quilt layout for baby quilt #2 except instead of pinwheels, the pieced blocks are butterflies.  There are twenty five main squares that alternate between a solid block and a pieced block.  The center is surrounded by some sashing, contrast rickrack and then the border.


It was my first quilt and took me a long time to do and get it right.  I think it took me close to eight months, working on it little by little.  Here is the proof that they were still in my belly when I completed the first one.  That was my goal, having one finished by the time they were born.  I really liked how it turned out.


I machine quilted the straight lines of the pinwheels and bars along the border.  But I hand quilted designs in the solid blocks.  Hand quilting did not take me as long as I had anticipated because I had to rest a lot by that point in the pregnancy.  I laid on the couch for hours at a time and needed to keep my hands busy.  Hand quilting portions of baby quilt #2 may take a bit longer now that the girls are out of my belly and crawling all over the place!


There are eight small pieced pinwheel blocks around the border, which helps the quilt border really pop.  And right now that is where I am currently stuck on baby quilt #2. 


The pattern I took the butterfly squares from made a 6 1/2" block only. I need to resize it to a 4 1/2" block.  It shouldn't be too hard to do, but I keep putting it off. I would like to have the quilt top completely pieced by the time the girls turn one, but time is slipping away fast and I'm busy with other projects.  So we'll see if I make it.


Sunday, May 27, 2012

Blueberries!


On Friday, we went blueberry picking at Bobrook Farms.  I had wanted to go last year but was very pregnant at the time and in no condition.  Luckily, a very nice friend picked some for me then.  This year, we brought the girls for their very first berry picking and picked a gallon of blueberries!


The girls didn't help us pick any berries, lazy babies.  They mostly sat and looked around at everything there was to see.  It was a warm morning but we were still in the shade most of the time.


Dara discovered there were berries in the buckets and any time we set them down to pick more from the bushes above, she would crawl over and 'pick' some berries out of the bucket . . . silly girl.


Mmmm . . . nothing like fresh picked berries.  They both love blueberries!


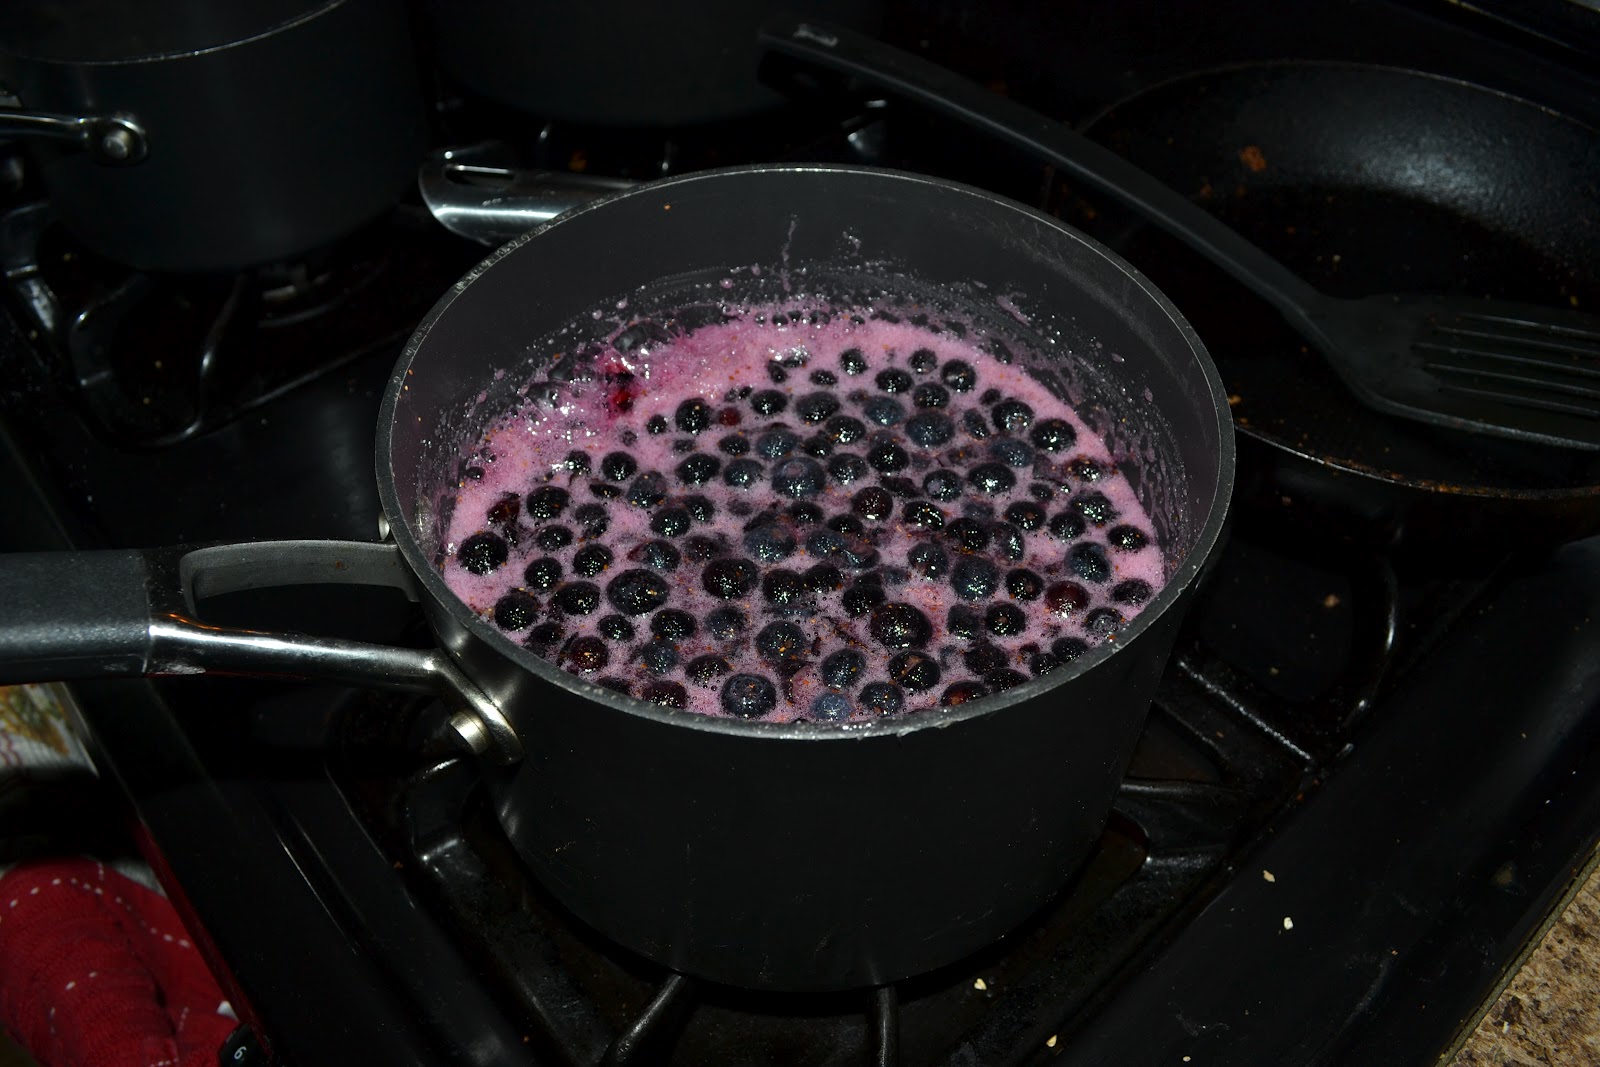
After we got home from picking them, I made frozen blueberry pie filling.  It took two quarts of berries but I now have two blueberry pie fillings sitting pretty in my freezer waiting for the day they will be baked. 


You freeze it in a pie tin, then wrap it and store it in a freezer bag.  Then pop it into a store-bought pie dough and bake it still frozen.  Will save one for when we have company this summer.  Yum!


On Saturday, I decided to make jam for the first time.  I learned I need some more equipment next time I try to make some.  First, I need a larger pot for cooking the berries because it almost boiled over about three times.


Second, I need a wire rack for cooking the jars evenly after they are filled with jam.  Third, I need tongs with the rubber ends so I can pick up the jars without dropping them back into the boiling pot of water and burning myself.


It was a success though.  I have eight 8 oz jars of fresh picked, home made blueberry jam!  Now I need to decide whether I should go black berry picking tomorrow or not.  I really want to and make some blackberry jam just like my grandmother used to make.  But we will see if I can make it out of the house early or not.  Tomorrow is going to be a hot one.

First Family Vacation


We took our first family vacation this week.  We spent two nights at the Retreat at Sky Ridge in Eureka Springs.  It was wonderful; a nice break from the routine and very relaxing.  By very relaxing, I mean as relaxing as a vacation gets with two 11 month olds. We didn't really get out to see the town; a couple stops at the grocery store, a quick drive through the old town when it was too hot outside to stroll, and a failed attempt to eat out at restaurants that were closed when we went was all we experienced of Eureka Springs.  There were times where the girls were both screaming and Kevin and I took out our frustration out by snapping at each other.  But there were also wonderful moments where the four of us were happy and at peace. 


The first thing we did on arrival was set up a baby proof area for the girls.  I'm so glad we brought the superyard.  We were able to enclose a large area on the rug so they didn't hurt themselves as much falling when they try to stand.  They loved the feel of the wood floor though and both ended up lying on the strip of it next to the couch at one point, smacking it with their hands.

As you can see, we were really roughing it.  The cabin had central air and heat, a nice little kitchen with everything we needed (although we avoided using the one frying pan because it was in sorry shape with its Teflon coating flaking off).  There was also a jacuzzi hot tub in the bathroom.  What a romantic, warm and relaxing soak Kevin and I could have had if we had come here before babies.  But instead we had a lot of fun turning into a swimming pool for the girls.  We filled it up a couple of inches more than their usual bath level.  They were splashing and pulling themselves up to look over the edge at the surrounding mirrors and crawling around through the water.  It was so cute to watch naked babies having fun.  I took pictures but I think I'll draw a line at posting nude photos of the girls for all the world to see.  I'm sure they will thank me later.


Probably the nicest part of the cabin was the porch swing.  The porch remained shaded and relatively cool with a nice breeze even during the warmest part of the day.  We spent time swinging with the girls on it, which they thought was great.  Once they were napping or in bed for the night we got to relax swinging back and forth and listening to the rustling leaves of the surrounding trees.


We went fishing at a little stocked pond on the property.  Our dog, Anna, enjoyed the walk down and even got her feet wet chasing insects around the pond.  There was a small dock to fish off of.  We didn't catch anything but it gave the girls a chance to sport their new shades.


Anna loved the trip.  The Retreat is very pet friendly; a horse and ducks roam free around the office.  They left a bag of treats in the cabin especially for Anna.  She had so much fun running around, chasing butterflies and sniffing all the new things.  It's a great life for a dog. 


The girls are growing so big.  Although there were a lot of moments on this trip when we wish we hadn't come, I'm very glad we did go.  We have a few good pictures and a lot of great memories with our babies while they are still babies.